You will need
- Your tassel
- Strong tape (duct, masking), preferably black and 2 inches wide
- If using duct tape, supplement with masking or similar, as well
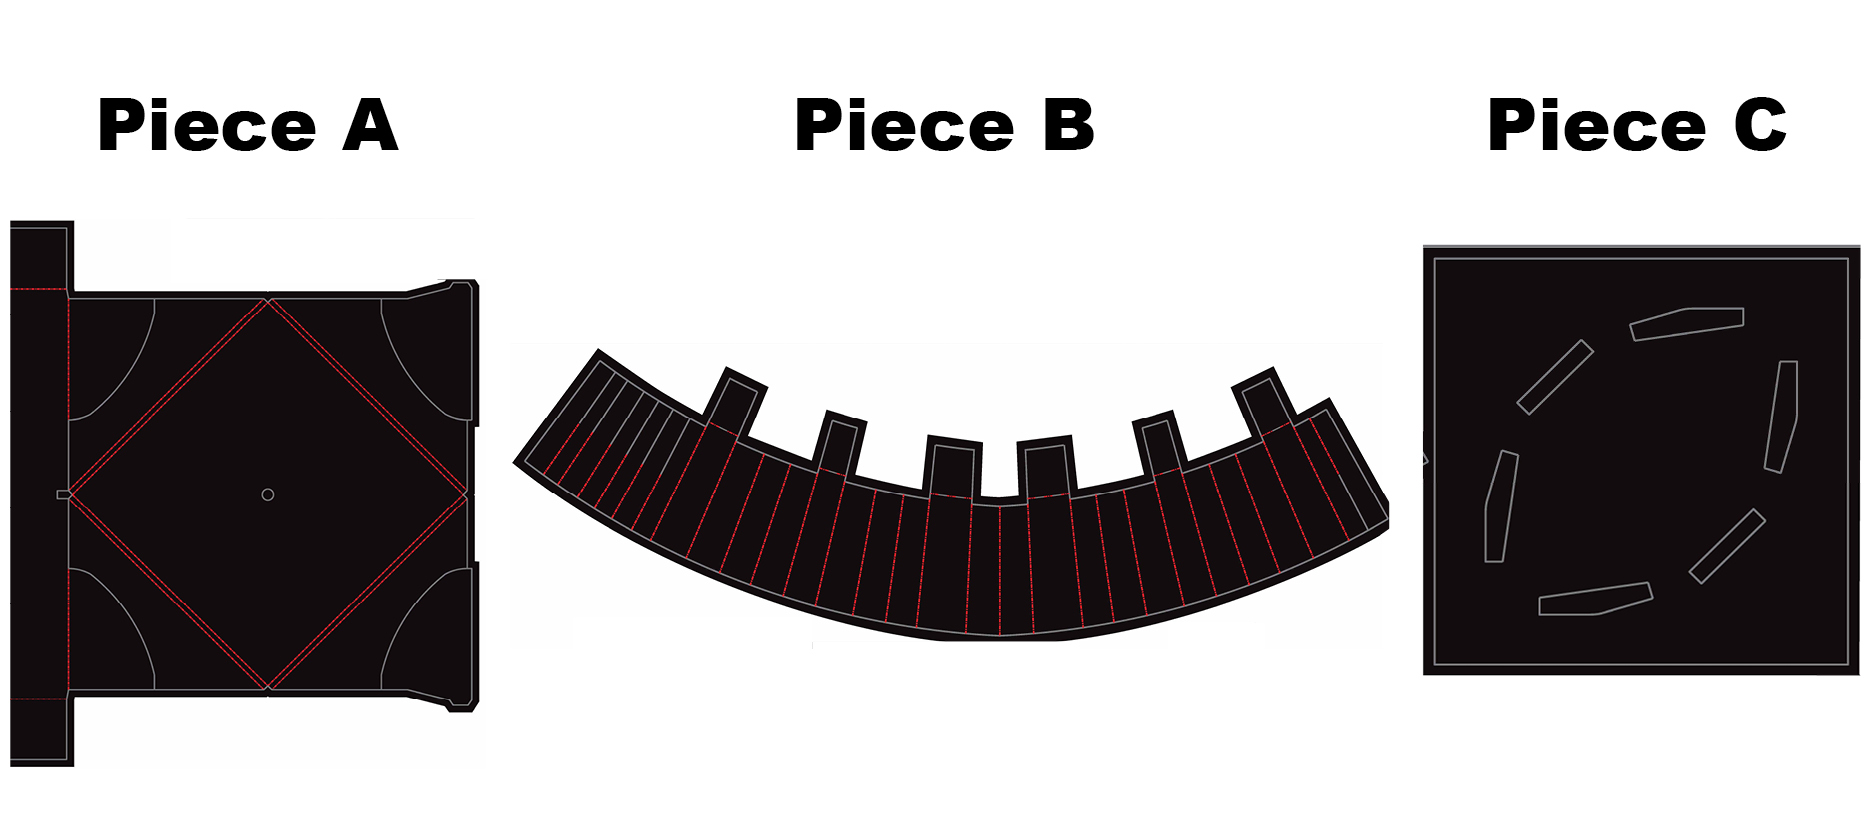
- Pieces A, B, and C from your Commencement celebration box
- Optional: An X-acto knife or strong scissors for cutting decorations
- Cut 4 pieces of strong tape, each 3 inches long. Set aside.
- Remove piece A from the shipping box by pressing along the perforated lines.
- Bend piece A along the scored lines to create flaps. The mortarboard top is now revealed!
- Thread the loop of your tassel through the hole in the mortarboard, from exterior/top to interior/bottom.
- Using something other than duct tape, affix the tassel loop on the interior side of the mortarboard. (Duct tape works, but it may damage the tassel, so it is not recommended.)
- Wrap the headband (piece B) around your head and hold the ends together at the spot that feels like a good fit. Mesh to create a circle.
- Bend the headband tabs along the scoring lines; set aside.
- Place piece C onto piece A and align the corners so it fits within the flaps. Piece C is now covering the taped-down tassel loop.
- Fit the headband tabs of piece B into the slots on piece C.
- Fold the flaps of piece A down and secure with your prepared pieces of strong tape.
- Flip the cap over and smooth the tassel.
- If desired, cut the graphics from the interior of the shipping box. Each graphic may be bent at the base to create a foot you can tape to your mortarboard.